I am excited to share a series of guest posts with you by other Artful Parents and teachers while I step back from the blog a bit this month! I hope you enjoy the new perspectives, different ideas, and fresh energy that each brings to this space. And I encourage you to leave a comment after the post to continue the discussion, add your own viewpoint, or simply say thanks!
Guest post by Joanna Bolick of Tuesday’s Frog Photography
The Christmas I was 5 years old my parents gave me the best gift ever—a little, black, handheld Kodak camera! I imagine that they provided me with a few instructions, such as “push this button” or “look through here” and then let me have at it. Looking back at those film photographs there certainly couldn’t have been a lot of direction, judging by the number of leg, belly, or waist-to-neck shots I masterfully shot (where were their heads, I wonder?) But then again, I was five, and it was just a thrill to be taking photos! I’m positive that I was delighted by and proud of those shots back then, though nowadays, as a professional photographer, they aren’t the kind of shots I’d want to show my clients.
However, I do think they belong in my portfolio of work (with a large disclaimer, and date, of course!) because they were still taken from my point of view—the view of a 5-year-old with a much shorter perspective than the adults around her. Perhaps because I’m still on the short side, I have a great empathy for kids, and I love working with them. So in an effort to prevent more images of belly portraits (unless you’re pregnant and desire that sort of thing) I’ve come up with easy, fun, and active ways for you to encourage and develop your child’s point of view, whether or not they’re actually behind a camera, video, or camera phone lens.
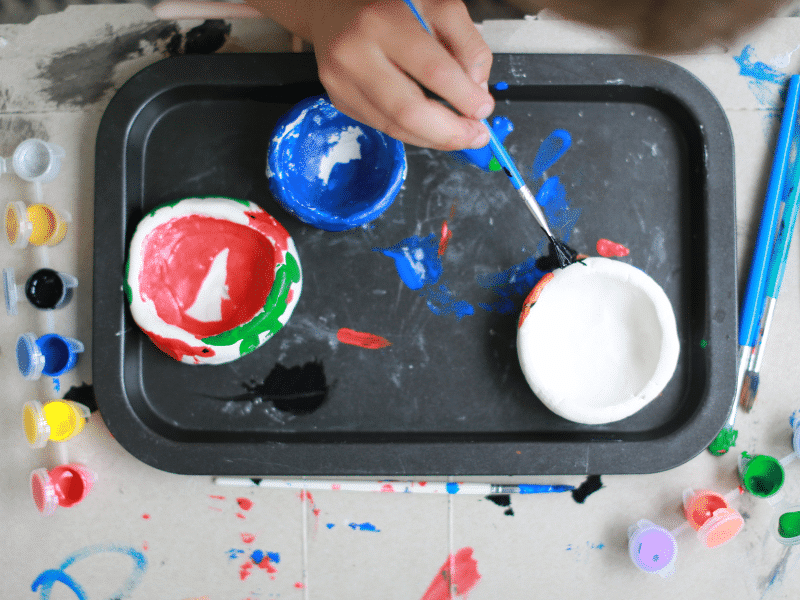
**The good news is that the supplies for these projects are minimal, and don’t require you to use a camera. What you might want are a few pieces of cardboard, a craft knife or scissors, and a black marker or letter stickers.
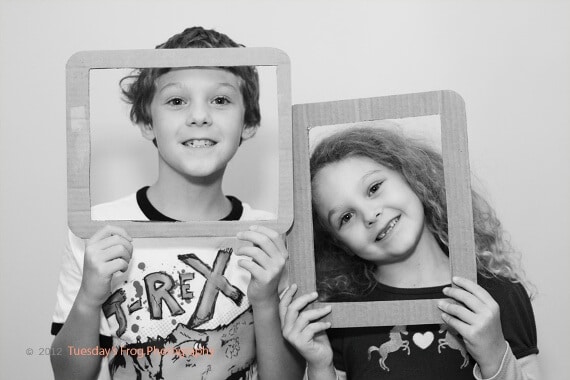
Our primary prop for these activities is a frame. If you happen to have some unused picture frames around the house, pop out the acrylic or glass and use those! We always seem to have an overabundance of cardboard on hand, so I simply cut a rectangle out of a piece of 10” x 12” cardboard with a craft knife. (Actually, I did this twice because I have two kids and it’s just easier if everyone has their own frame.) I would encourage you to stick with a rectangular frame to begin with, as that is the shape of most camera viewfinders as well as photographic prints.
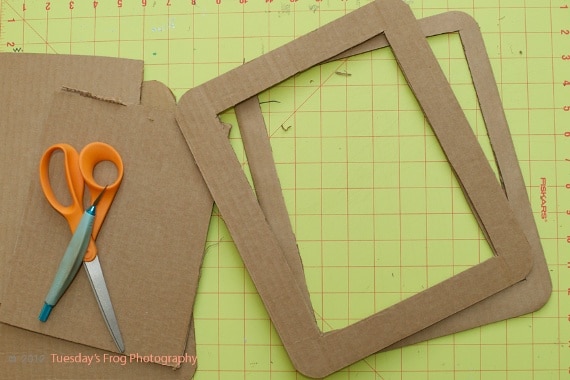
Supplies: craft mat, craft knife, cardboard
Composition is the fancy word for the artistic arrangement of the parts of a picture or photograph. When considering composition, it’s important for kids, and adults, to remember that they can turn their camera, or move their body, in different ways to capture different types of photographs. So here are a couple of activities to help teach your kids about composition:
Frame It!
The first game consists of handing the frames to your kids and asking them what they’d like to photograph around the house. Have them pretend that the frame is a camera or viewfinder, and send them on their way to frame their favorite things. (Star Wars figures, unicorns, and our cat were the primary subjects at our house.) When they point out something, say, “Frame it!” and have them hold the frame around their subject. (This can be difficult with a temperamental cat…maybe find still objects.) If you’re spending a few seconds on a particular object, encourage them to study what they’re seeing within the frame. Ask them questions to help them discover the best way to frame the object, such as “What would the picture look like if we laid on the ground to take it? or, “Oooh, what would it look like if we held the frame up over their heads?” or “What would happen if we turned the frame this way?” What you’re really doing in this game is teaching your child to look at an object from multiple perspectives. You’re helping them develop their artistic eye by seeing what’s inside the frame! As a children’s photographer, I tend to spend a lot of time on the ground…perhaps you can guess the reasoning behind that after you’ve played this game.

For this picture, I might say, “Can we get closer to the cat?” or “How would the photo change if we turned the frame the other way?”
Too Much Clutter
This may or may not be a tricky way to get your kids to clean their room or other play space…
Step 1: Find a messy space – preferably a child’s toy area and not your own unorganized, messy desk. It works best if we illustrate this point with their stuff and not our own.
Step 2: Have your child hold their frame in front of the space. If the mess is on the floor, have them hold the frame parallel to the floor, low enough to the ground that they can still see through the frame. Ask them what they see, and listen closely to what they say. Are they able to focus on one individual portion of the messy space? Do they see one yellow Lego block or a huge lump of blocks that hurt mommy’s feet when she steps on them? Explain to them that a cluttered photograph is overwhelming. It can make your [artistic] eye tired. It’s like looking through pages of “Where’s Waldo?” or “I Spy” books, where there are too many things going on in the picture for your eyes to take in all at once. It’s hard to know where to look first.
Step 3: So what do you do? When you’re looking for that wily Waldo, you have to break down the page and study it in small sections. Ask your child how they could break down the objects to make a new picture that would be easier to look at. Suggest that they put away some of the things from the mess in order to make the picture simpler. Give them some time to “unclutter” their photograph (i.e. clean their space, or just be creative) and tell them you’ll be back later.
Optional Step: If your house is sparkling clean then you can illustrate this point by pulling together a bunch of random objects (preferably small toys) and filling the frame with the objects. Then have your child move objects outside of the frame, using the items they keep inside the frame to tell you a picture story.
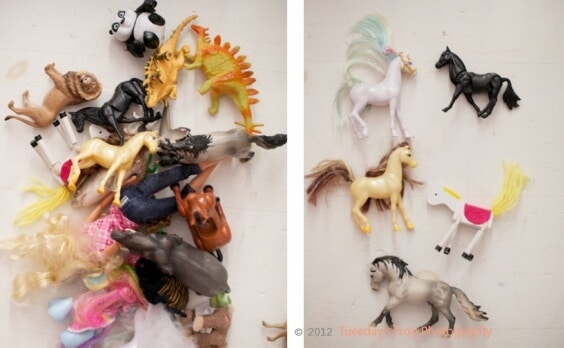
Q & A with Harper: What do you see? My toys! [allow time for cleaning] Now what do you see? My favorite sweet horses on the farm.
Although this may seem like a crafty clean-up game, what you’re really teaching your young photographer is how to compose their pictures by narrowing their focus. In addition, you’re also encouraging them to use the objects they choose to photograph to work together to tell a story.
Literally and physically, they’re taking the stuff that’s not important out of the frame. A great children’s book that illustrates this point is Simple Pictures Are Best by Nancy Willard, illustrated by Tomie de Paola.
Disclaimer: While I’m a big proponent of lifestyle photography, and not “fixing” images so that all life has been eliminated from them, I think it’s important for kids to learn that there are some things to avoid when composing photographs. If you have a messy house, take a close-up of a person’s face so you can’t see the clutter, or clean up the clutter. If you’re shooting a nature scene outdoors, avoid shooting the power lines or trespassing warnings (unless they add an artistic element to your story.)
Talk the Talk While You Walk the Walk
Speaking of the outdoors, here’s some simple vocabulary you can use while you’re on a hike, hanging out by the river, or at the park or playground. (If you forget your frames, simply use your fingers.)
Notice your kids studying an insect or flower? Encourage them to move in for the close-up: in a close-up photograph the object fills your frame. Your subject might be tiny in real life, but through macro photography it’s body is magnified so that you can really study it. You’ll also run across this kind of photography in many science books for kids.
When you take a horizontal photograph, you hold your camera (or frame) so that its longest part is parallel to the horizon. Form the letter “L” using your index finger and thumb in both hands, then hold your hands out in front of you with your thumbs touching. A horizontal picture is great for landscape photography because you want to capture the wideness of the world in front of you. The Blue Ridge Parkway provides many overlooks for this type of lesson!
When you’re taking a vertical photograph, your picture is taller than it is wide. (Turn your “L”s on their side.) A vertical picture is good for taking pictures of tall things, like trees, statues and flag poles. It is also used frequently for portrait photography – when taking a picture of a person’s face — because a face is typically taller than it is wide.
(You can reinforce this vocabulary by labeling your frames with an “H” sticker for horizontal and a “V” for vertical, or by just writing the words in marker on the frame itself.)
Decorate Your Frame
Last, but certainly not least (and actually, you could do it first) here’s an activity I know Jean will appreciate: get crafty and decorate your frames! You might even find it fun to go back and photograph a few of those toys your child considers most important in his or her life, and surprise them with an 8×10 print to fit in their newly-decorated frame!
For More on Composition
P.S. Here’s an activity for your older kids: grab your frame & some string and study up on the Rule of Thirds.
—