


Try making painted salt dough ornaments this Christmas by melting crayons on warm ornaments. These are a new favorite process art activity!
Updated November 2024
Safety update, November 2026: We originally made these ornaments with classic salt dough. Because kids handle the dough before it’s baked, and the FDA advises against using raw flour dough for children’s crafts, we now use a flour-free baking soda clay instead. It rolls, cuts and decorates the same way. The recipe is at the end of this post.
The Artful Parent
Family-life ideas and sharp reads, in your inbox.
It’s almost Christmas time and we have a great new way to decorate salt dough ornaments!
Salt dough is so versatile. We’re always tweaking and experimenting with materials and techniques. This time we combined two all-time favorite crafts, melted crayon art and salt dough, to make painted salt dough ornaments for a beautiful vibrant ornament to hang on your tree.
Check out our favorite flour-free ornament dough recipe at the end to help you get started. For even more craft and ornament ideas, check out 10 Salt Dough Ornaments for Kids.
How to Make Painted Salt Dough Ornaments

MATERIALS
- Flour-free ornament dough (recipe at the bottom)
- Crayons (Buying through this link may earn us a commission, at no extra cost to you.)
- Straw or other tool to make holes for hanging ornaments
- Washcloth, paper plate, or placemat (optional)
INSTRUCTIONS
- Make your dough
Follow the recipe below to make a batch of our flour-free ornament dough. Lay parchment paper down for your dough. The parchment paper helps to keep the dough from sticking to the table.
- Roll out your dough
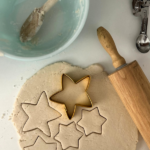
Use a rolling pin to roll out the dough and cut out shapes with cookie cutters.

- Bake your ornaments
Use a straw to poke a hole in the top of your ornament. Bake at 175F for 1 to 2 hours, flipping halfway, until hard and dry. (Baking is a must for this one, since the warm ornaments are what melt the crayons.)
- Decorate with crayons!
At the end of your baking period, an adult should take one ornament at a time out of the oven (one for each decorator) and let it cool for a minute or two before kids draw on it with crayons.
The crayons will melt as they glide over the hot surface of the ornament, leaving a thick and shiny wax coating of vibrant color just like it does with melted crayon rocks.
- Let cool
Allow your ornaments to cool and dry before hanging them up.
Some Helpful Tips
Once the ornaments cool down, the crayon doesn’t melt as readily. There will be a mix of melted crayon and not-so-melted crayon. Put your partially melted ornaments back into the oven to reheat and fully melt your crayon decoration.
An adult should handle the ornaments coming out of the oven. Once each one has cooled for a minute or two and is warm rather than hot, set it on a paper plate or placemat for decorating, which also protects the table from the crayon. (It’s the same idea as our melted crayon rocks, just at a gentler temperature.)

Our Favorite Flour-Free Ornament Dough
- Prep Time: 15 minutes
- Cook Time: 15 minutes
- Total Time: 24 hours (including drying time)
- Yield: about 12 to 15 ornaments 1x
- Category: crafts
Description
We made salt dough ornaments for years, but because kids handle the dough raw, we now use this flour-free baking soda clay instead. It rolls, cuts, stamps and paints just like salt dough, and it dries smooth and bright white.
Ingredients
2 cups baking soda
1 cup cornstarch
1 1/4 cups cold water
Instructions
- Stir the baking soda and cornstarch together in a saucepan, then stir in the cold water until smooth.
- An adult should cook the mixture over medium heat, stirring constantly, until it thickens to the texture of mashed potatoes, about 10 to 15 minutes.
- Turn the dough out onto a plate, cover it with a damp cloth and let it cool completely before kids handle it.
- Knead until smooth. Store any dough you aren’t using right away in a sealed bag so it doesn’t dry out.
- Place a fist-size piece of dough on a sheet of parchment paper and cover with a second sheet of parchment paper. Roll the dough out with a rolling pin to about 1/4 inch thick.
- Use cookie cutters to cut out the desired shapes. Pull away the extra dough from around the shapes with the cookie cutters still in place.
- Use the end of a drinking straw, a skewer, or a chopstick to poke a hole at the top of each ornament for hanging.
- If you plan to decorate the ornaments, do that step now. Try stamps and a stamp pad, poking a pattern of holes in the dough with the end of a straw, or pressing glass beads into the dough.
- Let the ornaments air-dry on a rack for 24 to 48 hours, turning them over once or twice. Or bake them on a parchment-lined cookie sheet at 175F for about 1 to 2 hours, flipping halfway, until hard and dry. Let cool.
- (Optional) Add a coat of Mod Podge or some paint (we like BioColor paint for these) and glitter.
- Add a ribbon through the hole and hang in the window or on the tree!
Notes
Why we switched from salt dough: Classic salt dough is made with raw flour, which can carry harmful bacteria. The FDA advises against using raw flour dough for children’s crafts, and baking the ornaments afterward doesn’t remove the risk from handling the dough beforehand.
This dough isn’t food either. Keep the stove step for adults, remind kids not to taste it, and wash hands after crafting. For very young children who still put things in their mouths, choose a different activity.
More Salt Dough Ornaments for Kids
- 10 Salt Dough Decoration Ideas for Christmas
- How to Make Stamped Salt Dough Ornaments
- How to Make Salt Dough Ornaments with Sparkly Glass Beads
- 20 Homemade Christmas Ornaments the Whole Family Can Make
- How to Make Cinnamon Ornaments
- Lacy Salt Dough Ornaments for Christmas
Want even more creative ideas?
Check out our Holiday Creativity pack!
Let’s celebrate the holidays with all things crafty! Here are 53 pages full of our favorite drawing prompts, creative play ideas, art activities, and more!
Pin It for Later

